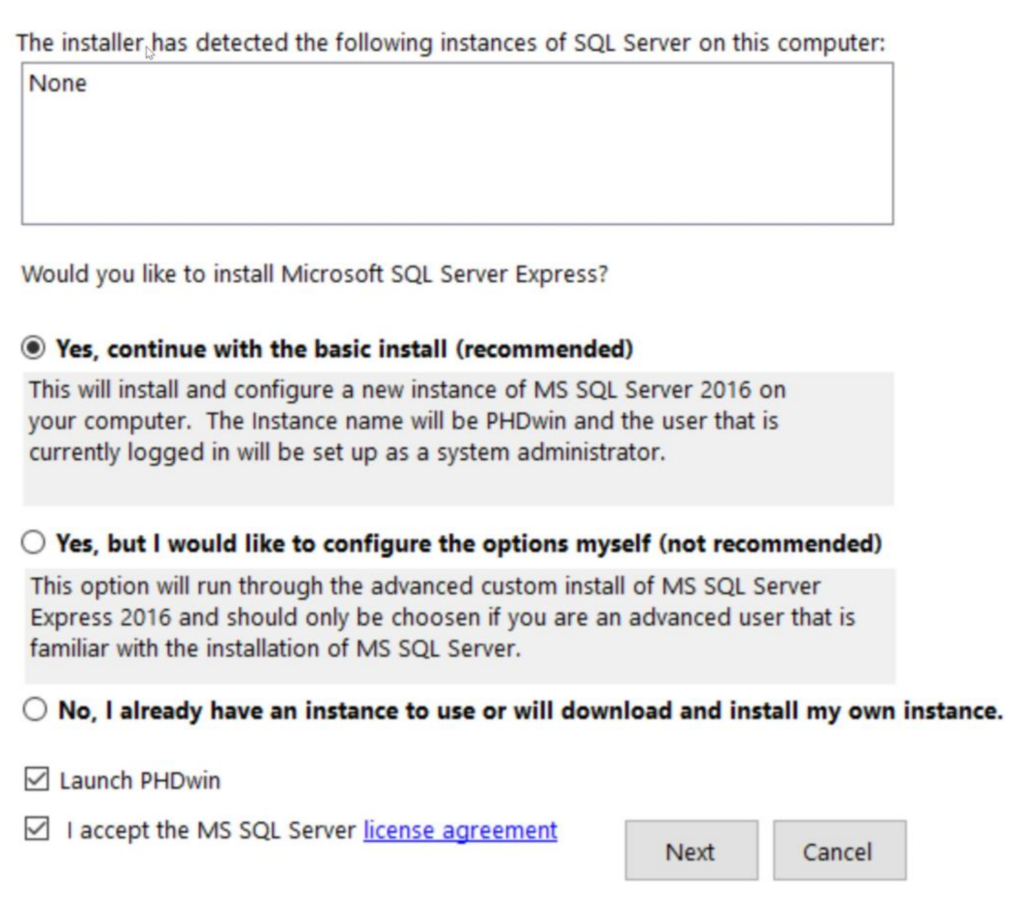
- Choose one of the following options:
a. “Yes, continue with the basic install” – this is the recommended option for most users, as it will install a new instance of SQL Server Express 2019 with default settings. The account that is currently logged in will be set up as a system administrator, and the instance will be named “PHDWIN”.
b. “Yes, but I would like to configure the options myself” – this option is not recommended for most users, as it requires advanced knowledge of Microsoft SQL Server. You will need to specify the instance name and system administrators.
c. “No, I already have an instance to use or will download and install my own instance” – choose this option only if you have a different version of SQL Server that you prefer to install, or if you plan to install the database engine on a network server. If you are updating your build of PHDwin and do not need another instance of SQL Server, you can also choose this option.
- If you selected one of the “Yes” options, accept the Microsoft SQL Server license agreement by checking the box.
- Click “Next” to start the installation of SQL Server 2019. If you selected the custom install option, you will need to configure all options.
- When the SQL Server installation is completed, click “OK” to finish the process.
- Click “Done” to exit the SQL Server setup.
After installing PHDwin and SQL Server, you should license the program and create a new database by logging in. You can install and run multiple versions or builds of PHDwin on the same machine, and if you run the installation file for a higher build number than the currently installed build, it will automatically overwrite the existing build.